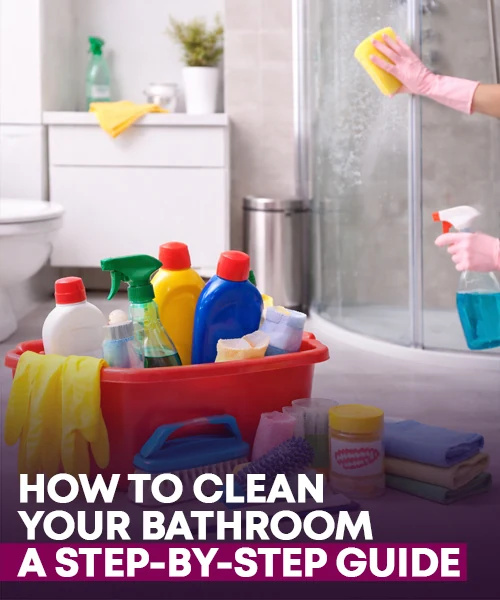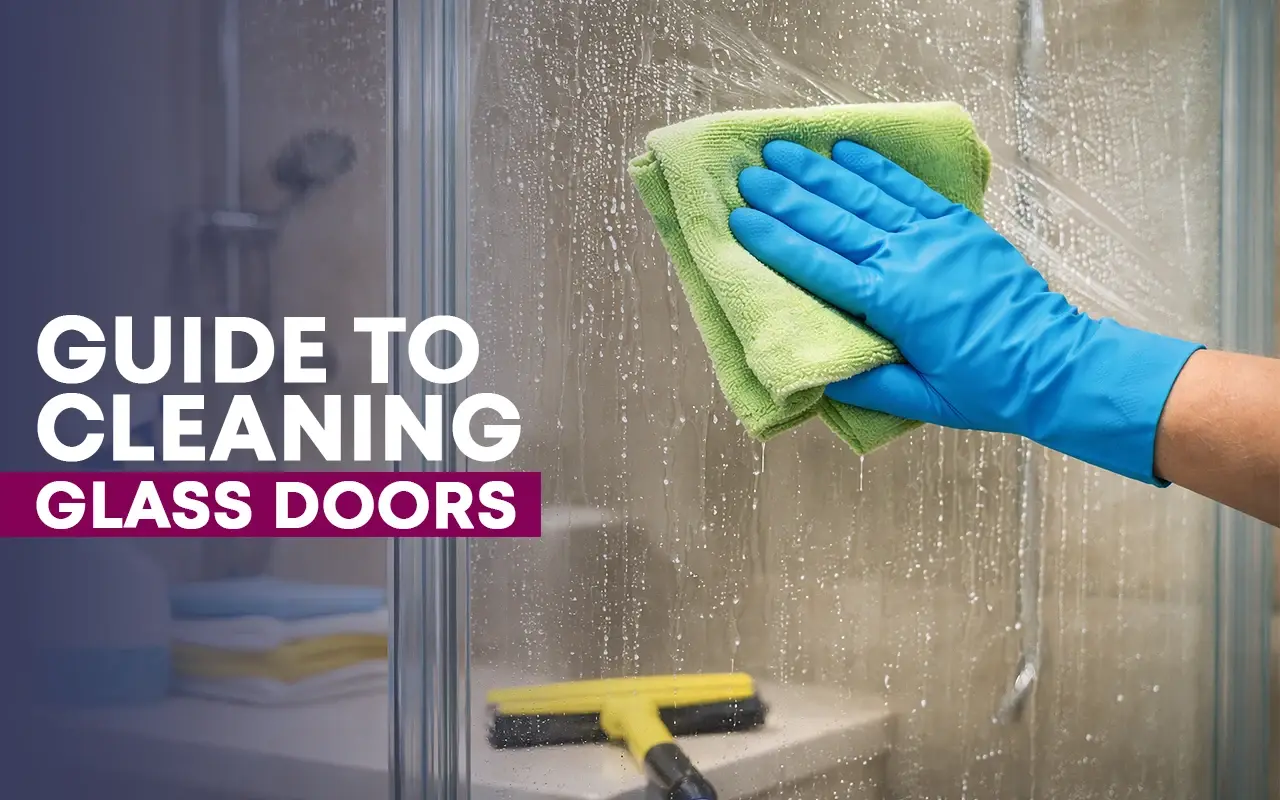
Imagine completing a bathroom and being extremely proud of your finished product, only to have the entire look ruined by dirty or streaky windows and shower doors! Whether you finished the job recently or years ago, there’s nothing that can ruin its looks, and even affect the value of your home faster than dirty glass.
For any room to have a truly spic and span appearance the glass surfaces need to be gleaming. That’s true of the mirrors and glass shower doors in bathrooms, and the glass doors and windows exposed to the outside elements. So, how do you ensure that they sparkle?
The Tools You Need
- Squeegee
- Extension handle
- Microfibre cloths, old T-shirts or newspapers
- Ear-buds
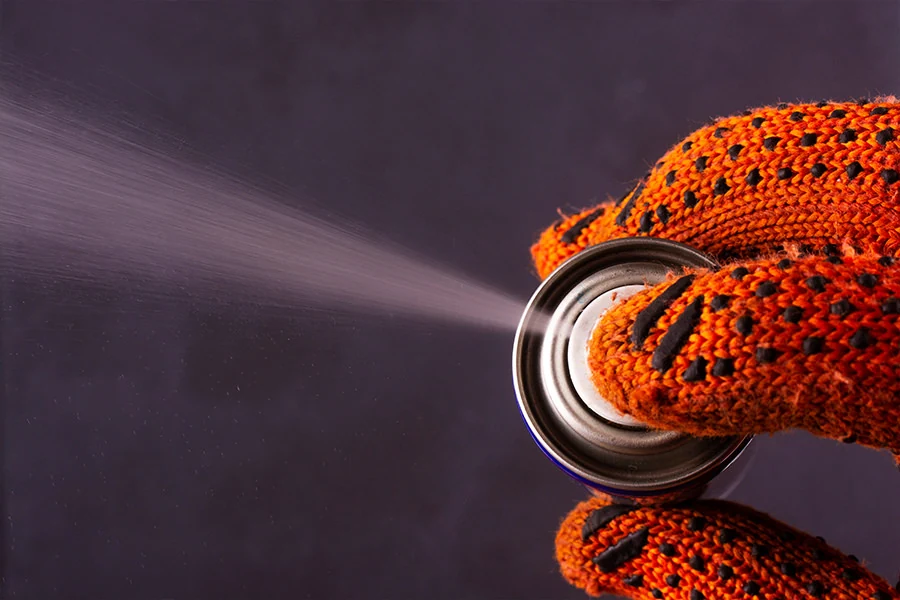
- Cleaning fluid
- Spray bottle
- Gloves
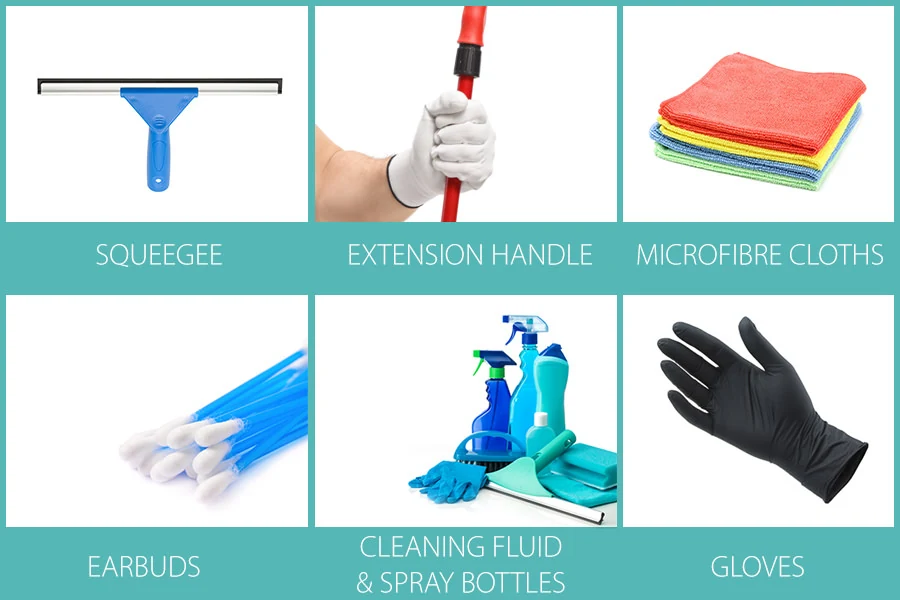
When it comes to cleaning any glass surface, the humble squeegee is the most important weapon in your arsenal. If you’re cleaning surfaces that you can’t reach on your own, fitting a long handle to the squeegee head might be more practical than using a ladder. And since it also works well on tiled walls inside and outside of the shower it really will earn its keep.
Besides the crucial squeegee, you should also stock up on microfibre cloths. Old t-shirts or newspapers to wipe the windows and doors with. This is basically a matter of what you have available and your personal preferences; newspapers work well, but some people hate the way the ink rubs off.
You can wear gloves if it really bothers you, but you like the way newspaper works, or opt for clean cloths instead. The key factors here are a soft, absorbent material that will soak up whatever you use to get the grime off the glass.
Next, strange as it may sound, we advise you stock up on a few packs of ear-buds before you begin. There’s nothing better for getting at the residue that can accumulate in corners as you spray and then wipe away the cleaning fluid. Finally, speaking of cleaning fluid, you’ll need some in a spray bottle.
How to Clean Shower Glass with Vinegar
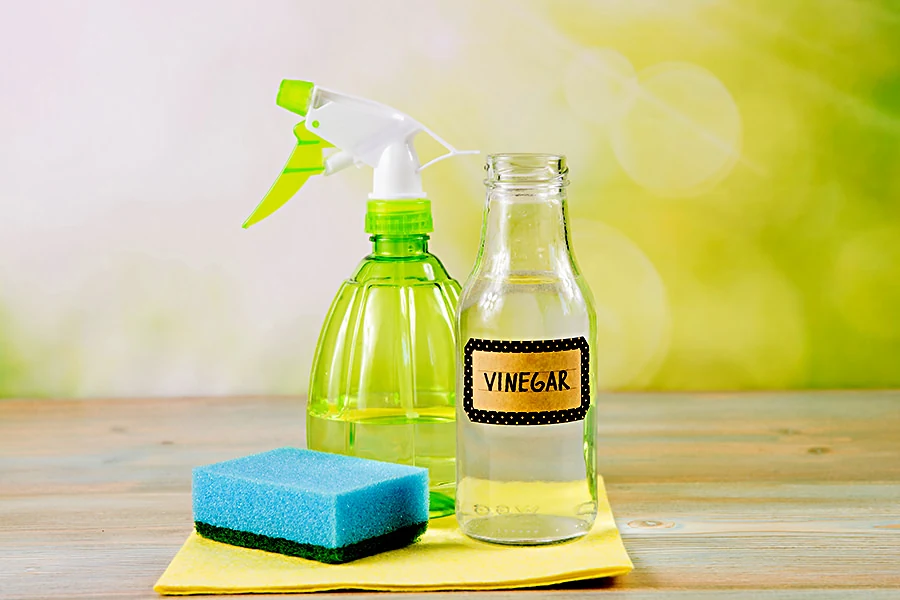
Vinegar works very well as a shower glass cleaning agent, and you can cut the smell with a few drops of essential oil. You’ll need to use distilled white wine vinegar, mixing one part of vinegar with three parts of distilled water in a microwave-proof bowl.
Microwave the liquid for a minute, leave it to cool and then decant it into a spray bottle. Spray a thin film onto the glass and leave it to break down the scum for a few moments. Then cover your squeegee with your cloth or newspaper and rub the glass with the spongy side. Remove the cloth and scrape the blade of the squeegee down the door immediately, then run a dry cloth over the surface and clean out the corners using the ear-buds.
IMPORTANT TIP: Never use vinegar if you have any marble or stone in your shower. The vinegar can damage these materials, and in this case, it’s better to use diluted dishwashing liquid as long as you know it has an effective grease-cutting formulation. And of course, if you don’t want to use vinegar or dish soap there are several commercial cleaning products available.
What Are Hard Water Stains?
There’s no discernible taste difference, but hard water refers to water that has a high concentration of minerals, especially calcium and magnesium. Soft water is the opposite and doesn’t contain significant amounts of these minerals.
Generally, rain falls as soft water and then, as it moves through the ground and waterways, it picks up the minerals that make it “hard”. Hard water can have a major impact on your bathroom’s appearance.
The reason for this is that hard water is the direct cause of limescale, those unsightly chalky and whitish stains that often appear on showerheads, fittings and the glass surfaces in your bathroom. Limescale and hard water stains are the same thing and are also known as mineral deposits. But the damage that these deposits can do is not only skin-deep.
Apart from the cosmetic issues, the chalky build up can cause scratches on the surface of whatever it accumulates on. Also, it can clog pipes so that water doesn’t travel through properly which can compromise your entire planning system. Besides all that, the limescale can stick to the insides of appliances which makes them less energy efficient and can potentially damage them.
How Do You Remove Hard Water Stains?
Now that you know where the deposits come from, what can you do about them?
That depends where they are in the bathroom, and how long they have been developing for. Hard water stains in your toilet bowl generally require a commercial cleaner or bleach, with easy-to-follow directions.
Early-stage limescale can be removed with the vinegar, dishwashing solution or commercial products, cloths and squeegees, as described above. Naturally, this will require considerably less elbow grease than it will take when the scum has been building up for some time.
Tip - Consider a Water Softener
In some cases, hard water might be a chronic problem for you. You can find out if you live in a hard water area by checking various maps online, or by booking a water quality test for your residence if you can’t find the information you need.
If the water in your home is especially hard and is not only clogging up your pipes and appliances, but also leaving deposits that make white laundry look grey, impact the effectiveness of soaps and shampoo, and leave cloudy spots on crockery and cutlery, you might want to consider a softener.
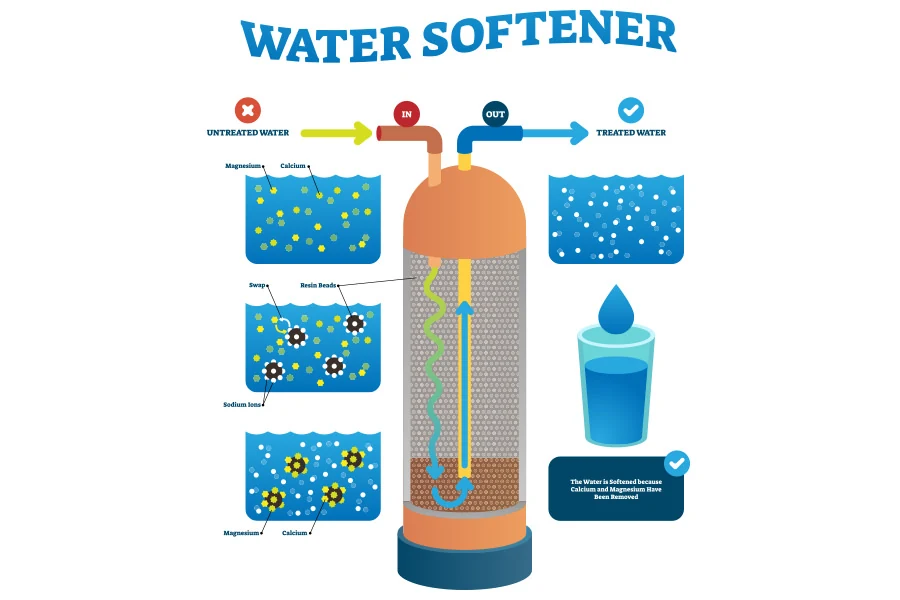
Water softeners are machines that make hard water soft again. They come in various sizes and are installed wherever the water enters a property. Typically, they consist of a water-softener tank that is tall and narrow, and a brine tank that is shorter and wider.
The tanks are connected with a small-diameter fill-tube, and the softener tank is also fitted with a discharge hose that runs to a nearby drywall or drainpipe. The softener tank contains resin beads which are specially formulated to have a negative charge.
As the water percolates through the beads, its positively charged mineral ions are deposited onto the resin surface. The beads are never removed and so eventually reach capacity. They can’t attract any more ions, which is where the brine tank comes in.
The softener tank needs to be cleaned at this point, and this is achieved with water flowing from the brine tank into the softener tank via the fill tube and then rinsing the deposits off the resin beads. The water is flushed out via the discharge hose, and the softener tank is back in action.
The brine tank works at the right time thanks to an on-board computer that tracks how much water passes through the softener. When a pre-programmed amount has passed through, the brine tank is activated. While the resin beads in the softener tank are permanent, you will need to replace the brine tank’s salt or potassium chloride pellets every now and then.
How to Clean Limescale Off Shower Glass
Your bathroom surfaces’ limescale problems might have gone a little beyond the early stages. If this is the case, increase the vinegar in your homemade solution to at least 50% and apply in the same way. If you’re still not seeing the results you want, you can add even more of the acid.
You can also leave the vinegar solution soaking on the glass for longer to really start to break up the hard water bonds.
SIDE NOTE: it’s also advisable to soak showerheads and tap handles in your vinegar mix periodically, to prevent limescale accumulation.
If you try vinegar in all its forms, and all the recommended spray products on the market without any joy, it’s time to bring out the big guns in the form of baking soda. Pour some of the powder into a bowl and add water slowly, mixing to form a thick paste.
Rub the paste onto your glass and leave it there for an hour or so, then wipe it away and rinse the surface with your vinegar solution. Follow that up with a few swabs of a soft, clean cloth or newspaper and then dry it with your trusty squeegee.
Cleaning Shower Glass with WD40
The “WD” in WD40 stands for Water Displacement and it’s this property that makes it so ideal for cleaning shower glass and creating a spotless, streak-free surface. The spray’s ability to displace water means that it actually breaks down the bonds in soap scum or hard water stains so that they’re much easier to remove.
In other words, WD40 is another great option when hard water stains have reached the early-stage, still-easily-removable stage. You use it the same way you’d apply the heavier concentration of vinegar for tougher stains; spray it directly onto your glass door and then leave it there for at least 15 minutes.
When you’re ready to remove the WD40, you can wipe the surface down with a soft cloth. This is the only time when you don’t need to use your squeegee, since you don’t want the water displacing WD50 to get on it. You may need to repeat the process a few times to eliminate all deposits.
Don’t forget to take proper precautions when you’re using WD40 spray. Ingesting it is not that dangerous, but if you breathe it in, you’re at a high risk of respiratory irritation or even pneumonia. Additionally, contact with your eyes or prolonged contact with your skin may cause irritation and the substance is highly flammable.
If you get WD40 in your eyes, rinse them out with plain water as soon as possible. Do the same thing if the spray lands on your skin and try to prevent that situation in the first place by wearing long sleeves and gloves. Make sure the room is as well-ventilated as possible, with the door and a window open.
SAFETY TIP: Never use the aerosol near an open flame and always wear a mask before you start your WD40 cleaning project.
Tips and Tricks
To get the most pristine glass surfaces on the block, we suggest you:
- Clean from the top to the bottom of the glass.
This allows you to use the natural force of gravity in your favour. The cleaning fluid will run downwards anyway, so it makes sense to let it move to areas that you haven’t washed and wiped yet. - Wait for cloudy weather to wash outside windows
Streaming sunlight can cause the surfaces to dry too quickly, leaving a residue of cleaning liquid behind before you get a chance to wipe it away. If you wait for a cloudy day, you’ll be able to effectively remove every last drop. - Clean the woodwork and fittings, but do so with care
You should clean the framework, especially handles where grime can build up, but you don’t want to get the glass cleaning fluid on your woodwork. Put an absorbent cloth on the sill to catch any drips, and work in small areas so excess fluid can’t get onto the frames.
Daily Maintenance
A deeper clean is advisable every few weeks for all glass surfaces, but daily maintenance can also keep your shower doors looking better for longer. Keep a squeegee in the bathroom and wipe down the shower - it takes less than a minute - after each use.
Regular application of lemon furniture oil is also a great way to prevent soap scum build up. Rub it on with a soft cloth, and then let it sit for a few minutes before you wipe it off with a fresh rag or swab. As a bonus, it will smell as fresh as it looks!